Note: not every host is the same, so these steps might not match your hosting requirements. These steps work for most budget-friendly hosting companies like GoDaddy, HostGator + Bluehost. If you’re unsure about any of these steps, chat with your hosting company before making changes.
Changing your website URL or domain name can seem a bit daunting, but it doesn’t have to be super tough. This post will guide you through the general steps you’ll need to take, assuming your hosting company doesn’t have any steps of their own added in.
Step 1 – prep your URL
Before you update your WordPress URL, you’ll want to have the new domain name ready to go. If you do this as a later step, you run the risk of your site being down for longer, which is no good. This step is often the most nerdy, but that means you get the harder stuff out of the way first.
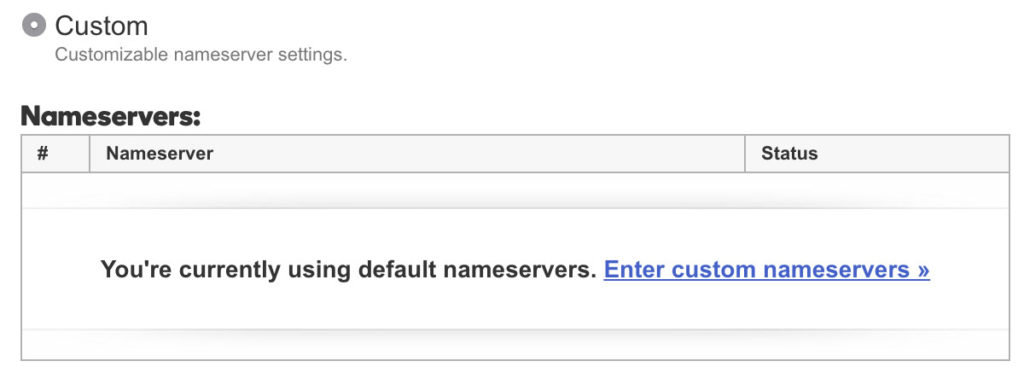
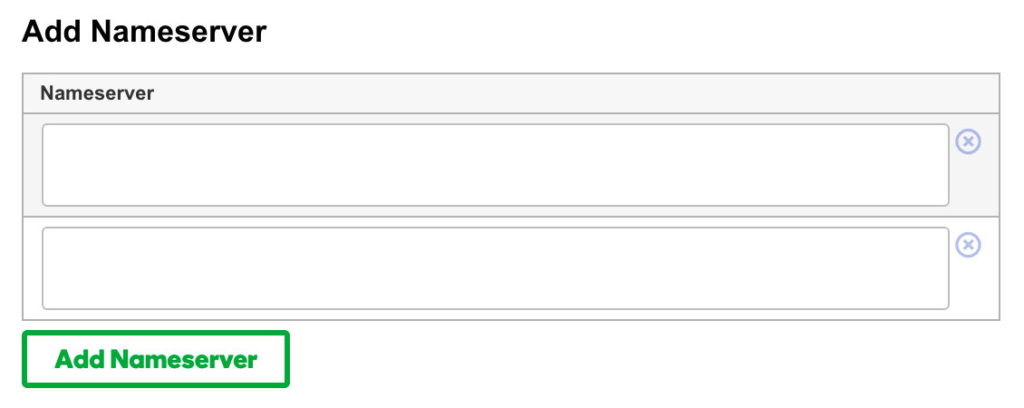
Assuming you own the domain you want to switch to, we’ll start by adding it as an add-on domain to your hosting account. If you bought the domain through someone other than your hosting company, you’ll first need to change the nameservers on that domain to match your hosting account. (What this does is gives your hosting company permission to display a website on that domain name.)
Most domain registrars make it really easy to edit the nameservers. You’ll set them as custom, then copy + paste the 2 nameservers from your hosting account in place. (Which you can typically find listed in the sidebar of your cPanel dashboard.)
If you bought the domain from your hosting company, or have the name servers set to custom, now it’s time to assign the domain a folder. Log into your hosting account + click the add-on domain icon. (It’s sometimes called assigning a domain.)
You’ll enter in your new domain + give it a folder name (directory) where all of the site files will live. The folder name can be anything you want, but I typically recommend naming it based on the URL with no spaces or special characters.
For example, tinyblueorange.com would have a folder name of tinyblueorange — but again, you can set it to almost anything!
Step 2 – change your URL settings
Now that your domain is ready with its own folder, log into your WordPress site at the current (soon to be old) domain. Navigate to Settings > General where you’ll see two fields that list your current domain name.

Change those fields to your new URL. Make sure to include http:// (or https:// if you have an SSL set up). Then click the “Save Changes” button.
Note: once you save your changes, this will take your site down. don’t stress though! In the next step we will bring it back up.
step 3 – move your site
Either logged into your hosting account cPanel or through FTP, it’s time to move your site files to their new home — the folder you created in step 1.
If you’re using cPanel, navigate to File Manager, otherwise connect to your account with FTP + find the folder that your site currently lives in.
Move all contents of the folder (but not the primary folder itself) to the new folder you created. Say, for example, I was changing tinyblueorange.com to ilovebrutus.com, I would find the tinyblueorange folder + move the contents of that folder into the ilovebrutus folder. I would not just move tinyblueorange into ilovebrutus, because that would not work. Instead, that would show the website at ilovebrutus.com/tinyblueorange.
You’ll be moving files like wp-config.php, index.php + subfolders like wp-content, wp-admin. You may have additional content like a webfonts folder as well, which is why it’s important to move all of the folder contents.
The transfer/move might take a few minutes because there are lots of files to migrate. Wait until it’s 100% done before moving on to the next step.
Step 4 – update your site links
At this point, your site should be displaying at the new URL.
Head to your new domain /wp-admin to check out your new login screen and log in with the same credentials you used for your previous domain — since you moved everything over, the users didn’t change.
Head to Settings > Permalinks + click the “Save Changes” button. This helps reset any links in case they got stuck during the migration.
You’ll also need to update your image URLs in pages + posts. Thankfully there is a plugin that does this for you. Install + activate Velvet Blues Update URLs + follow their steps to change all occurrences of your old URL to your new one.
Once that’s done, you’ve officially moved your site to your new domain!
Step 5 – redirect old links (optional)
While this step is completely optional, it’s a good idea to set up redirects so that anyone clicking a link to your old site, finds your new site instead.
My favorite way to do this is through cPanel because you can cover ALL of your links with a single redirect. In fact, I wrote a post on this awhile back that covers the same steps you’d take today. Read about “wild card” redirects in that post + then scroll to “creating redirects” if you want to hop to it right away.