Whether you didn’t know how — or that it was even an option — so many bloggers shy away from adding images to menus on their WordPress sites. Text links are great for many reasons, but there are times where it’s nice to add images to the menu in your header. Plus, it’s easy to do!
How to add images to a menu
First things first, you need to have your image created + ready to go in your Media Library. If you have the file saved to your computer, head to Media > Add New to upload the image to WordPress.
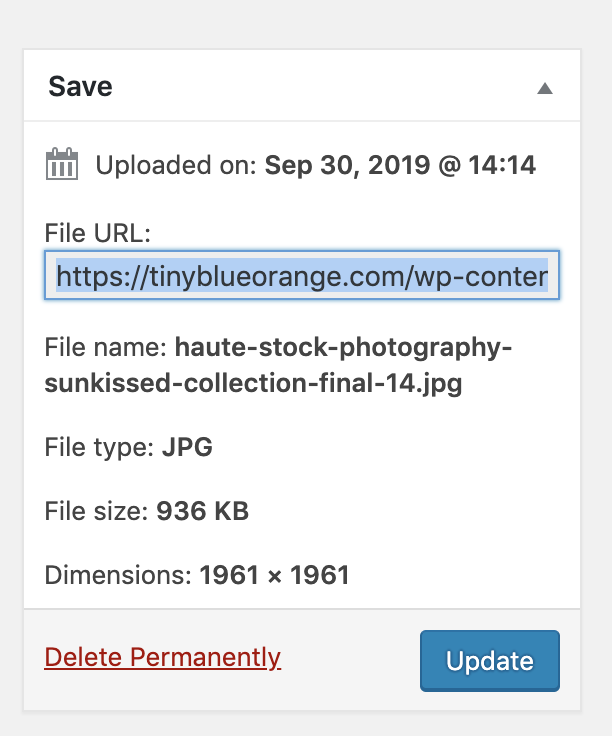
Once the image has been uploaded, click the edit link to get the details you need. On that media editor page, you’ll see a link to the “File URL” in the right sidebar. That’s the link you’ll need to add this file to your menu.
Editing your menu
With the link copied, head to Appearance > Menus to add the image to your menu of choice. You can create a new menu or select the menu to edit that you want this image to appear in.
If you’re adding a link to a page or post on your site, add that page to the menu like you normally would. If you’re linking to an external site, use the “Custom Links” option to add a link to the menu.
Once the page/post/link is in the menu structure, it’s time to add the image. Click on the link you’re editing so that the box opens up to reveal all of the editing options.
Time for a bit of code, but thankfully it’s as easy as copy + paste.
In the Navigation Label type the following code. The replace the # with your image link from the first step + Menu Img with a description of the image you’re adding.
<img src="#" alt="Menu Img" />
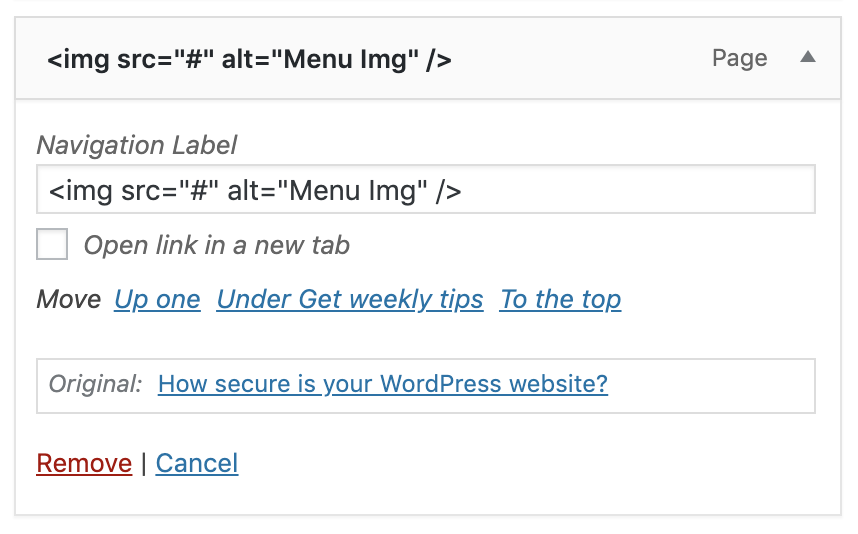
Once your image link + alt description are in place, save your menu changes + refresh your site to see the image in action!
Why add images to your WordPress menus
I am a big fan of text on sites. It’s easy for all visitors to read (whether they are using a screen reader or not), keeps your site loading quickly + is great for SEO. But that doesn’t mean there aren’t times when it’s a good decision to add an image to your menu.
Adding your logo
The most common reason to add an image to your primary menu in WordPress is to show off your logo. (This site has their logo right in their menu.) You would link it to your homepage + nestle it in with the other important page links.
I recommend this route to clients who want a logo centered on their header menu. If you have links to the left + right of your logo, why not add the image right to the menu? That way you don’t have to rely on some code sorcery to make the layout look good.
Creating an event-specific button
If you know CSS, or have a developer that can help you, you can style individual menu links to look like buttons. But sometimes you need something up right away + in that case, an image of a button is a great option.
Create the graphic in Canva (or your editor of choice). When you’re done, upload it + add it to the menu using the steps above. This option is great for those temporary links in your menu for upcoming events or special service offerings.
And now you know how to add images to a menu in WordPress the next time you need to highlight something special.